

The difference between Beauty Bloggers (was there ever a more hated term?) and I, is that I am a real, normal person, who does things that normal people do. I know, I know, they’re all real people, but the trouble is that as soon as a blogger becomes vaguely successful, they stop behaving like regular people. They get free products, record videos in HD, and invest in good lighting.
My lack of beauty blogging success however is your gain. Yes, I’m talking to you, my six loyal followers.
I find beauty blogs and vlogs frustrating because they represent the minority — those people who have a million face serums at hand, always shower twice a day, and have an hour to take their makeup off at night. That is not me, and I’m boldly hazarding a guess that it’s not you either. This post is dedicated to how I, as a normal person, get my skin to look alright in Instagram pics.
I am lucky to have skin that does not present too many problems. Although I am pretty lucky in this regard, I do get the odd pimple, and dry skin is my ever-present companion. My favourite part of makeup application therefore, is foundation.
Before I turned thirty, the very first thing I did upon addressing my face was to slap that beautiful blurring potion across my face from cheek to ear, and go to town with a foundation brush that a MAC consultant once convinced me to buy. In case you were wondering, my reason for changing this ritual has nothing to do with my age, and everything to do with the Kardashians. It was around this time that I heard that the reason Kim Kardashian has such flawless skin, is that she primes her face with magic unicorn tears before jumping into her ‘foundation routine’. This of course is laughable because we all know she’s never been so plebeian as to do her own makeup. Nevertheless, I invested in a silicone primer from Woolworths… better to get a basic product first, and graduate to a higher-end one later. I liked it, and have since upgraded to Benefit’s POREfessional, which makes me a bona fide makeup guru if you ask the internet. I have also added not one, but two products to my pre-foundation skincare vibes.
 I use a night cream from Woolworths. I apply it after I get out of the shower in the morning, because I’m sure my skin is not so advanced as to be able to tell the time. I figure that they make night creams a bit heavier than day creams because night time is a good opportunity to introduce some serious moisture to your face. Since my skin is on the dry side, I actually enjoy the slightly richer feel of this cream. Also, I like the packaging, and the fact that it calls me an ‘adult’. After showers, my face is crying out for the moisture, and applying the cream then allows enough time for it to settle into my skin before the cosmetic barrage. Why, you ask? Because I am never prepared for anything, and after I shower, I invariably have to rush to the kitchen and pull out the ironing board before asking Nic to iron whatever I’m intending to wear on that day… but I digress.
The second of my pre-foundation steps is MAC fix plus spray. I use this everyday, before and after makeup application. I’m not sure why. I’m not sure what it does; but I am sure that I love it. After two or three spritzes to my now beautifully moisturised skin, I pat my face ever-so-gently with my palms. It’s at this time when I typically start wondering whether I made a mistake in asking Nic to iron that particular skirt, and which long-wearing super-matte lipstick I’ll wear that day.
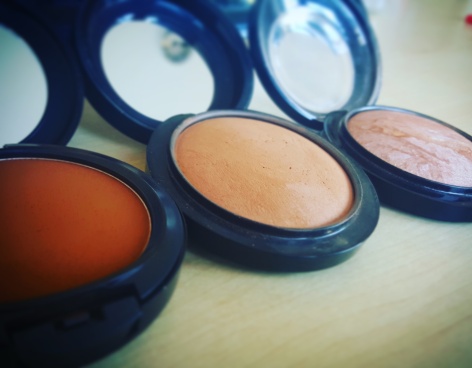
My foundation is now no longer a simple smear from an expensive tube. In order to get good coverage and the right tone, I use a couple of products. One is my favourite foundation – MAC Studio Fix Fluid in NC45 – I am paying salaries at MAC with this product alone. Another is the Inglot foundation I bought a few months ago which was always too dark for my skin, but which the consultant convinced me was my ‘true tone’. She colour-matched it on my neck, and I went along with it because she was wearing an official makeup-expert type outfit. These I use in conjunction with:
 Some LA Girl concealers which the internet made me buy, but which are surprisingly good and cheap.
- A MAC concealer palette which I love because it works, and because I had to buy it at the ‘pro’ shop which made me feel like a badass.
- Two MAC Matchmaster concealer sticks that I bought when I believed that contouring was the answer to all that was wrong with the world.
- Two BB creams (I’m looking at you Garnier and Kangol), that I bought a while ago and refuse to get rid of even though they don’t work even a little bit.
These I apply with a foundation or concealer brush, (or my fingers), and dab in with a dampened Real Techniques Miracle Complexion Sponge, not because it’s better than a Beauty Blender, but because it’s much cheaper and easier to get in South Africa.
I’m not telling you this to make foundation high-maintenance, but rather to illustrate that in order to get good coverage, I sometimes need varying textures, shades and tools. In Winter, I can often get away with wearing just my normal foundation. In Summer, I need to mix a darker shade in, as I like the beach and my tone deepens in the sun. Around period time, I break out around my chin, and need to cover up more heavily in spots. In busy times at work, I sometimes miss my lip wax appointment — that’s where the heavy duty yet cheap concealer comes in really handy. If you think that Instagrammers wake up with flawless skin, dust some power on their noses and flutter out of the house, you’re wrong. They have a messy drawer of cover-up foundations too, I promise.
Powders are my next weapon in the fight against imperfect skin. I use a sum total of three, for various reasons:
- Translucent powder from MAC to set the concealer I usually put under my eyes, and sometimes around my mouth and chin. This is to avoid it creasing in my fine lines. It’s colourless so that I don’t lose brightness in those areas. I tried a cheaper Nyx alternative, but it’s rubbish.
- Mineralise Skinfinish powder from MAC in a shade close to my natural tone around the outside of my face to provide some dimension. A much as I love the blank, one-shade makeup look, it tends to make people a little uneasy.
- MAC Studiofix Powder Plus foundation in a few shades darker, NW50. This is for the mythical contour. It’s the only contour I do, and I apply it where there would be a hollow in my cheek if I had one. I also apply a little to by beloved double chin.
I finish up with a touch of blush on the apples of my checks, and a powder highlight by MAC called Global Glow. The blush/highlight obsession has not set in yet, and I’m not about to encourage it — my budget is still recovering from the great eyeshadow palette disaster of 2016…
…and after only 28 additional steps, I’m ready to go!
At night, I stumble into bed, grope around in my bedside drawer and pull out my Garnier Micellar Cleansing Water (the pink one, not the oily kind), and cotton pads — the cheapest one I find at Clicks — and I wipe it all way. This I do with my dog child Murphy perched on the bed, staring deep into my eyes until I give his face a little wipe with the last, least mucky pad. Again, I have an ulterior motive here. I have a thing for white cotton bedding, and am loath to ruin it with foundation stains. I also have to mention here that I grab my trusty adult night cream at this time too.
My advice for being Insta-perfect is to do makeup your way, even if that means not to wear it at all.Makeup is meant to make you happy, not to make you acceptable to random people, whether on the internet or in real life. This is how I achieve that goal… find out the best way for you, and try not to listen to the rubbish other people will have you believe. ♡♡♡

Leave a comment